
Garageband is another unique gift from Apple for audiophiles and more pertinently for music creators or prodigies altogether. iPad further exploits the full functionality of GarageBand by extending the intuitiveness with its overtly simple but responsive touch screen gestures. GarageBand for iPad can be used to create, record, assemble, retouch and even as a fully trusted live performance kit. There are many features and tweaks available in GarageBand for iPad and despite the simple interface, it would take weeks to actually use or even get acquainted with the sea of options and features available. So, in this post we have tried to collect all the tips, sources, tweaks, methods and much more to help you comprehensively understand and use GarageBand for iPad. By the end of this post, you may or may not be a Pro at GarageBand, but you certainly will at-least be equipped with all the tools to unravel the rest of features and maybe even create your own music.
WHY PREFER GARAGEBAND OVER THE REAL THING?
- You can get access to thousands of instruments and effects from only one device without spending time, effort and money on each instrument separately.
- You can play and record instruments that otherwise are way too expensive or sometimes even beyond a mere humans means.
- Recording or Playing both can be done directly from your iPad.
- It can be a relief to others around as you can plug-in the headphones and keep all the music to yourself.
- You can restore the flavor of actual music by plugging in guitar or Keyboard and add some studio standard effects while you are at it.
- The most important feature is the ability to carry all these features compactly in your Backpack.
Table of Contents.
TIPS AND MINOR WORK AROUND TUTORIALS
Without further adulating GarageBand lets move on to the actual GarageBand iPad Tutorial. In this first section we will help you with some of the tips and other peculiarities that you must know before moving on to recording a song.
Import an Audio File
You can use the Drag and Drop method to simply add audio files into the black area of the timeline or ‘RealTrack’. But before all that, you have to convert your audio file into Apple-compatible format. Some of the iPad compatible audio files are MP3, AAC, and FLAC. The DRM protection may also pose a problem especially if you have purchased your file from Ovi, Zune Media store or the like. You can take care of it by removing the DRM protection and then proceed with the Drag-Drop procedure.
Adding Effects to Guitar Track
To add effects to your Guitar Track, tap-open the track info page, locate and tap on the guitar amp tab. You can then spin the amp window around by clicking on the Edit Button located on the top corner of the screen. You then have to go back to the guitar amp and click on the arrow pointing upward in the lower pane. You can then choose any standard effect provided from the single effects slot and add it to the guitar track.
Rename Track Region
You can also rename a region within the track by opening Track editor from your GarageBand iPad app. You can then see current name of the track at top left corner which can be renamed by double-clicking on it and then typing the new name.
You can use Guitar Amp in GarageBand only after connecting your electric guitar to your iPad. This can be done using 3rd party devices like iRig from IK Multi-media.
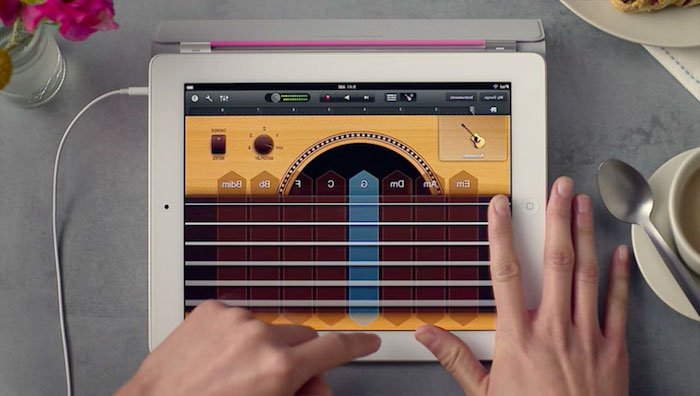
Chords used by the smart instrument(guitar, keyboard, bass or strings) can be edited for different variation or order rearrangement.To do this, choose a smart instrument, and then from the Song Settings Button, Tap edit Chords. On the instrument that you selected, Tap one of the Chord Strip and you can then begin rearranging by swiping the chord wheels. You can also choose the chord, alternate quality, and bass note. Tap Done when you’re satisfied.
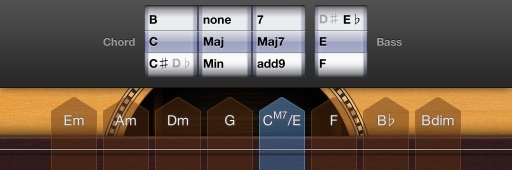
There is a lot you can do with Keyboard in GarageBand for iPad. You can begin with swiping between different Keyboard sounds. You can choose the size of keys and the number of octaves visible by tapping on the Keyboard Buttons.
Velocity can also be controlled with a dedicated control button on the Keyboard. Also, a particular Keyboard setup can be saved which can then be accessed from a custom category.
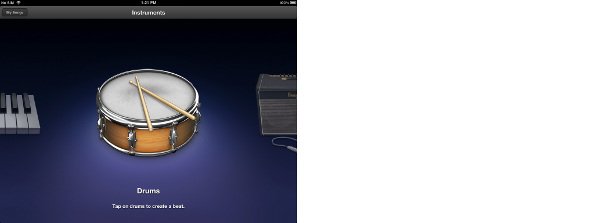
Drums
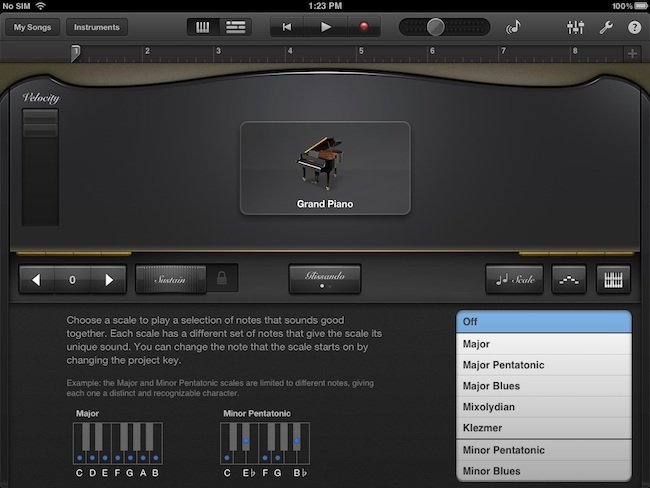
There are options to choose between different types of acoustic as well as electronic drum-sets. The drum output is totally touch-dependent, the harder you hit, the louder it gets. Some parts of drum set like hi-hat and snare drum will also produce different sound depending on the area you touch.
A repeating pattern can be activated by pressing and holding on two drums simultaneously, you can then move your fingers apart for an increased tempo or vice versa. In addition, swipes across the vertical plane of your iPad screen will increase or decrease the volume.
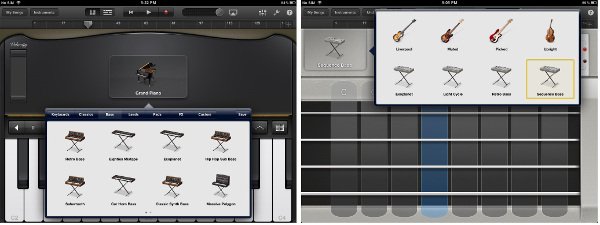
Electric, acoustic or synth bass sounds are at your disposal in GarageBand with just a single tap. You can simply use Smart Bass instrument to try all the variations or you can choose the Keyboard instrument and then select one of the Synth Bass Sounds.
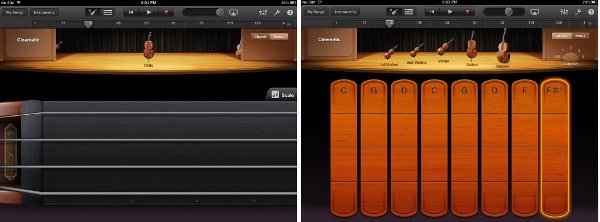
A lot of effects and repercussions can be added to Smart Strings that will enhance your overall guitar experience on GarageBand for iPad. A single chord can be played in various inversions with just a tap on each section of the chord strip. Plucked sound can be made by releasing your finger off the string and not by simply tapping it. A sustained chord can be played by sliding your fingers back and forth on the chord strip.
Individual notes can be played in notes mode by plucking on the fretboard. This will play back notes with an arco effect (bowed), but you can also play pizzicato (plucked) notes by holding one finger on the Articulation button on the left while you tap the string briefly.
Jamming in GarageBand for iPad
You can connect up to 3 iDevices with GarageBand over a Wi-fi or Bluetooth connection to participate in and create jam sessions. You can designate a particular iPad as Bandleader who has the ability to control playback and recording. Rest of the members of your jamming group can share settings or record all parts on a device.
RECORDING A SONG IN GARAGEBAND FOR IPAD | STEP BY STEP TUTORIAL
To record a song and then add other parameters to your song follow instructions listed below:
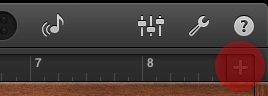
Step 1. Open the GarageBand from your iPad and then navigate to and tap on + sign located near the top left corner of the screen.
Step 2. From the menu that now pops up, Tap on ‘New Song’
Step 3. You will then be presented with various instruments to choose from as your first recording instrument. You can swipe across the options and select any instrument of your choice by tapping on it.
Step 4. From the ‘instrument view,’ you can then tweak and adjust intricate instrument settings according to your personal preferences.
Step 5. If the need arises, you can also create custom chords.
Setting up Song Parameters
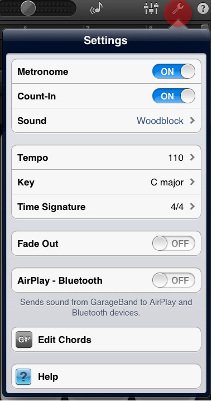
You can set up various song parameters like metronome, tempo, count-in, Key and time signature from the Song setting tab. Song Settings can be reached by tapping on Song Settings icon, which looks like a Wrench, once in the menu, various parameters listed above can be individually optimized.
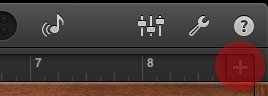 Making sections of your song will help you to copy-paste or move around certain sections like intro, verse, chorus etc., as you desire. Each of these sections is named with letters and by default, a song contains 8-bar repeating sections in GarageBand. You can then add more sections to the existing ones or adjust the length of sections already created. All this can be done by tapping on the Song Section Button located on the right edge of the ruler, as highlighted in the image below.
Altering the length of Song Section
You can alter the length of each section present or create by following the steps below:
Step 1. Tap on Song section button as highlighted in the image above.
Step 2. From the various Sections labeled as letters, Tap on, let’s say “Section A”.
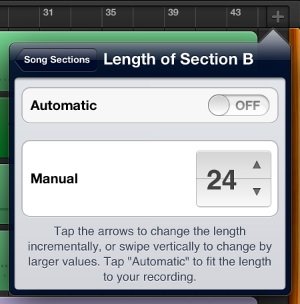
Step 3. You can then either turn the automatic mode on, or you can change the number of bars by tapping on the arrows located next to manual. For faster bar increments, press-hold and swipe your finger vertically across the iPad screen. You can set any value to the Bar, but it should be noted that overall, the total number of Bars allowed in a complete song is 320, so work accordingly.
Recording a Smart Instrument, Guitar Amp or Audio Recorder
To record an instrument part in Garageband for iPad follow these easy steps:
Step 1. First of all, make sure you are in Instrument view and not in Track view, then choose and tap the instrument you want to record.
Step 2. The Playhead can then be used to mark the starting point of recording. You can rewind to move it to start or tap on the ruler to choose a specific bar/beat.
Step 3. Once you are satisfied with every aspect, hit Record.
Step 4. Play the first section of the song and tap Stop when you are done. You can save yourself some time and effort if the section you recorded is a repeated riff or ostinato as you can loop or copy/paste it as much as you like.
Step 5. You can listen to the recorded section by moving the PlayHead to start of the section and if you don’t like what you hear, you can always tap Undo.
Recording for New Section
You can either add another instrument to the same section like above or you can choose to record new pattern in the next section. While the former can be done exactly like instructed in above section, for the latter you should follow the below steps:
Step 1. Tap on Song Section Button.
Step 2. From the tiny windows that pops-up, Tap on Add button. This will add Section B to your Song.
Step 3. Just next to Section B, you will notice a Blue arrow, Tap on it to set the bar limit manually.
Step 4. To save and close Section controls, tap anywhere on the Tracks View.
Step 5. You are now ready to record the same instrument with a different pattern in Section B.
Tip: To move between different sections of the song, you can swipe left/right across the horizontal axis of Track View.
RECORDING DRUMS

There are two major ways you can utilize in Garageband for iPad to record Drum parts. There is an easy way, where you can just use Smart Drum to record default drum parts, or you can try the complex method in which you can record each drum part separately and then layer it with more parts.
Method 1: The Easy Way
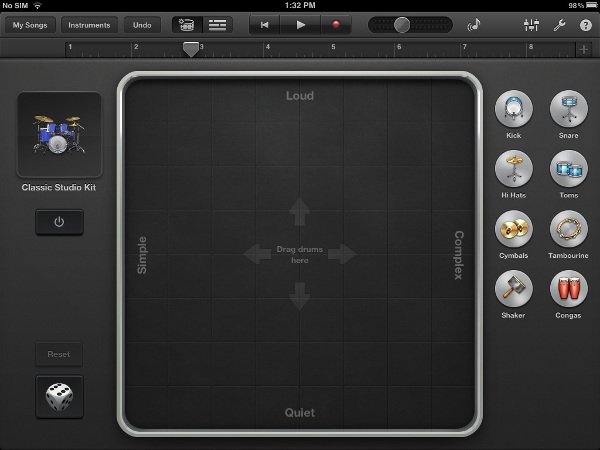
Step 1. Simply tap on the Track Button and select Smart Drums from instruments.
Step 2. You can then choose the type of drum you want to use. Like Acoustic or Electronic.
Step 3. Drag the elements of the kit on the grid to set up Beat.
Step 4. Now, move the playhead to the desired bar, hit record, do nothing and finally Tap Stop when recording completes.
Method 2. The ‘HighWay’
To develop grove and customize Drum/beat effects, you can record each part of the kit like, bass drum first, then hi-hat, then snare separately and layer them together for a more expert drum profile.
Step 1. Select the instrument in track header area.
Step 2. Tap on Mixer Button and check if the Merge button is ON. It is usually turned ON for drums by default, but if it isn’t, do it now.
Step 3. Optimize your Quantization settings by Tapping on Quantize Button.
Step 4. To record the first part of Drums, Tap Record, when you are done, move the PlayHead back to the start of the section and Record another part.
Step 5. Repeat the process until everything is recorded and then Tap Done.
EDITING IN GARAGEBAND FOR IPAD
To begin editing your songs in Garageband, you should at first have some working knowledge about certain important parameters. The most important of these parameters being, Track regions. Simply put, track regions are specific sections that automatically build in Track view as you finish recording a song. There are three types of Track region, each highlighted in 3 different colors:
- Green regions represent Touch Instrument Recordings.
- Purple regions show record parts from Guitar Amp or Audio Recorder.
- Blue Regions represent the mundane but useful Apple loops.
Now that you know what a track region means, you are ready to Edit each of them gradually as much as you please. To do so:
Step 1. Tap a single region in Track View. You can also select multiple regions by Tapping and holding on any single region, and then as you constantly press on the section, you can use subsequent finger taps to select other regions.
Step 2. To use the selected region as a loop throughout the length of the song, you will have to Tap again after you select the specific region. When you do so, an Edit Menu will appear, from the Menu simply Tap Loop. You can then shorten or lengthen the Loop by tapping the Region and bringing close or far the ends of it.
Step 3. To copy and paste a specific region anywhere in your Track, simply Tap-select the desired section. Tap again to bring forward the Edit Menu and choose Copy from the drop-down box.
Step 4. Now navigate the Playhead to the start of destination bar, double tap the empty space and choose Paste from the Menu.
Step 5. You can use the same double Tap menu and Tap-hold method to cut, delete, Join or split regions respectively.
After you are done fiddling with regions you can dive deeper into editing by modifying, editing and polishing every single note (Except Drums). To do this, you will first need access to Editor, this can be done by double tapping on a region and once the Edit menu appears, you can swipe a finger upwards or downwards to enter into Note editing Mode. After you are in, there are a lot of things you can do in editor mode ranging from viewing different parts to changing even the pitch of every note. Just swipe up and down, right and left, Pinch zoom, go crazy, explore every option and try every possible gesture and you will be a pro before you know it. Just make sure to Tap Done when you are done with this sorcery.
Quite obvious to state at this point, GarageBand for iPad is a fully loaded and studio-quality music App and there are a plethora of features, tools, Tweaks, and tips that cannot be explored in just one post. We tried to help and provide as much as we could in a single post. We can and will surely provide more information and tutorials in subsequent posts, only if there is an appreciable response. But before we wrap up this extensive iPad GarageBand Tutorial there are a final few instructions that will help you to get your created music off of iPad, into your Personal devices and maybe even to millions out there via iTunes.
SHARING CREATED FILES FROM GARAGEBAND.
Step 1. Return to the Main Menu by tapping on the My Songs Button.
Step 2. Tap and hold one of the Song icons, this will trigger a ‘wobble’ and almost everything on your iPad, including the icons, will start jiggling. Except, a few new buttons near the top left the corner, and that’s where you’re headed.
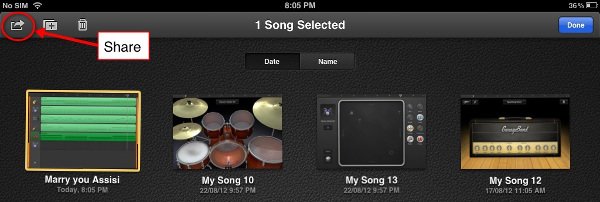
Step 3. Tap on the Curved Arrow button, which in fact is your Share button.
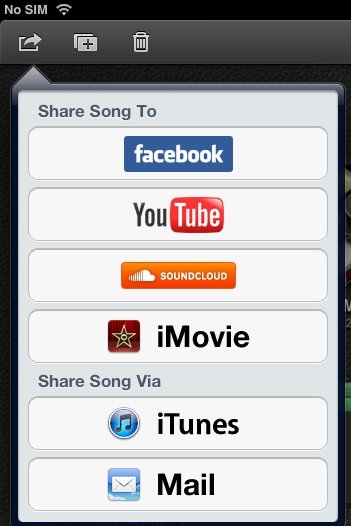
Step 4. You can now use various options to share your Music. You can either upload it to Facebook, Youtube, SoundCloud or iMovie(If you have installed it already.). The better way to do it is by email or iTunes.
SHARE, EXPORT OR IMPORT TO ITUNES
This final tutorial will help you to access your GarageBand for iPad files from your Mac or PC iTunes. There are two main ways to do this:
1. iTunes: Simply choosing iTunes from the Two options that show up will actually convert your Track into an audio format, which can then be played in iTunes or any other music player. You can however further edit this single-layered track with software like Mixcraft, Acid Music Studio, GarageBand, Logic, Pro Tools, and Audacity. But you will no longer have separate instrumental tracks like in GarageBand as all of them will be merged into one single audio file.
2. GarageBand: This option is particularly advantageous for users with Mac or a PC running desktop version of GarageBand. In contrast to the previous option, this method will actually preserve all the track layers and effects, to be further edited or enhanced on Desktop version of GarageBand.
After you decide and choose any of the options above, you can retrieve your file from your Desktop via iTunes by following the steps shown in the self-explanatory image added below.

Quite obvious to state at this point, GarageBand for iPad is a fully loaded and studio-quality music App and there are a plethora of features, tools, Tweaks, and tips that cannot be explored in just one post. We tried to help and provide as much as we could in a single post. We can and will surely provide more information and tutorials in subsequent posts, only if there is an appreciable response.
Leave a Reply to Noel Cancel reply